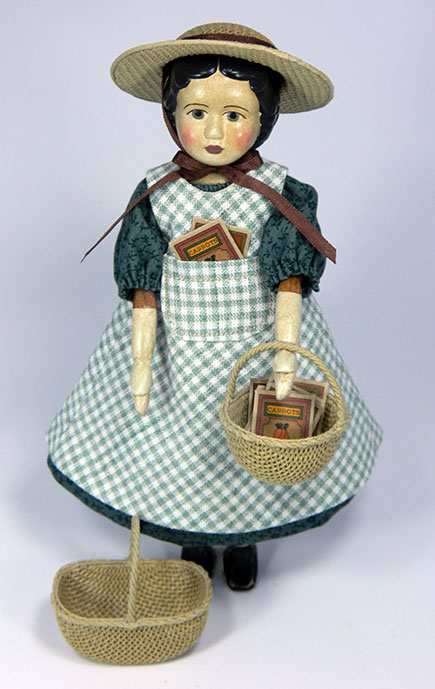
HITTY'S GARDENING SET
WITH STRAW HAT, 2 BASKETS, PINAFORE AND SEED PACKAGES

|
|
The completed set on my wooden Hitty. Additional linen mesh is available on my Website under Supplies. |
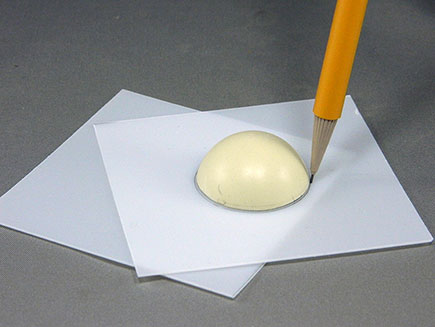
Begin with the hat. Here we are determining the holes to cut in the thin (but stiff) sheet plastic. Plastic can be from cottage cheese lids, etc. Cut holes in the center of each plastic square.
|
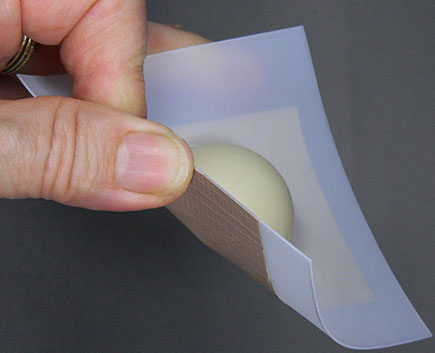
Secure the hat mold (make sure not the round basket mold) in the hole of one piece of plastic by placing a piece of duct tape over the hole with the mold pressed onto tape in the hole. |
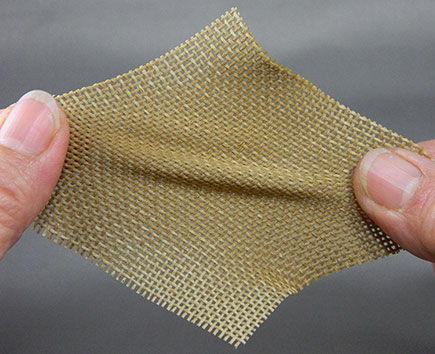 Stretching the mesh on each diagonal to get it started.
 |
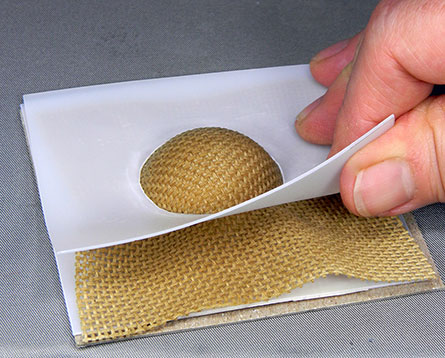
After dampening the square of mesh, place on mold and put second plastic "donut" over it. Bring the upper plastic all the way down so it is flat on top of the levels below. Run your nail at the crease of the crown where it meets the brim.
|
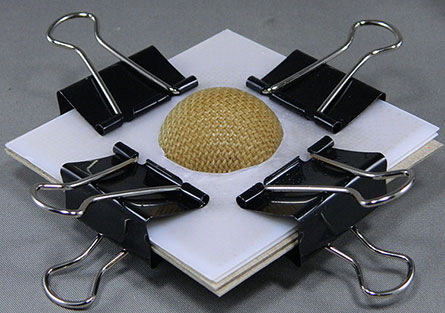 Lift top plastic to check to see the horizontal mesh (the brim) is flat with no wrinkles, then clamp with binder clips or you can use 8 clamp type clothes pins (2 on each side). Binder clips (size medium) available at office supplies.
 |
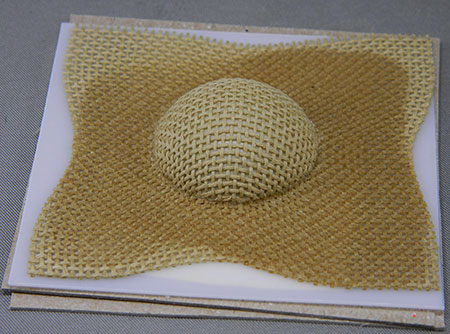 When you see the exposed crown is bone dry, gently lift the top plastic,but do not disturb flat part until it also is bone dry. Because the mesh is sandwiched between 2 layers of plastic, it takes much longer to dry, but if left in the air as the pic shows above, it will dry in no time.
 |
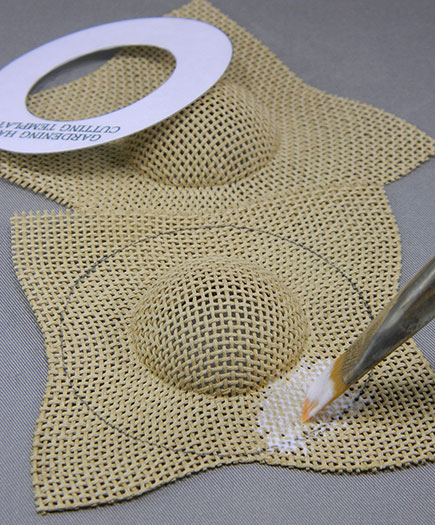 Since the hat is made of two identical layers, you need to mold one more hat form. Once both are dry, draw the hat pattern on the hat form that will be on the bottom. Then spread glue mix just on the donut area maybe a bit beyond the drawn line.
 |
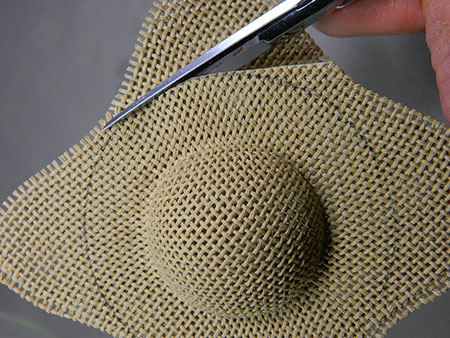 Press the second layer of hat form onto first really fusing the glued area around the brim. Once that is done, draw the donut template on the top layer and using very sharp scissors, cut a smooth line on the pencil line. I swear by Gingher scissors and am embarrassed to admit to owning more than a dozen pair just for my use alone - not counting the ones in my workshop. Available in most stores (Joann Fabrics) or my website.
 |
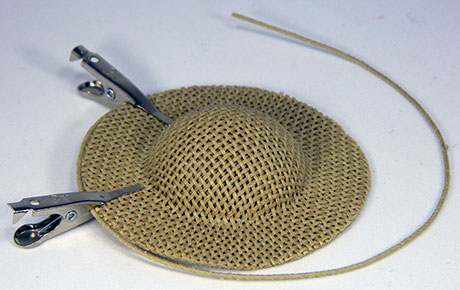 Pause to make the 3 types of twist you will need for all of the mesh items (see photos below). Using the twist specified in the instructions, run a bead of glue along outer cut edge and glue on the twist. Use the tiny clamps to secure as you go. Trim excess off end when about 1/2" away from starting point and butt ends for a nice smooth almost invisible join. Only 2 clamps were provided in the kit, but I use these for a huge long list in my dollmaking, my favorite being while styling doll's hair. You can get extras (set of 5 on my website in Supplies).
 |
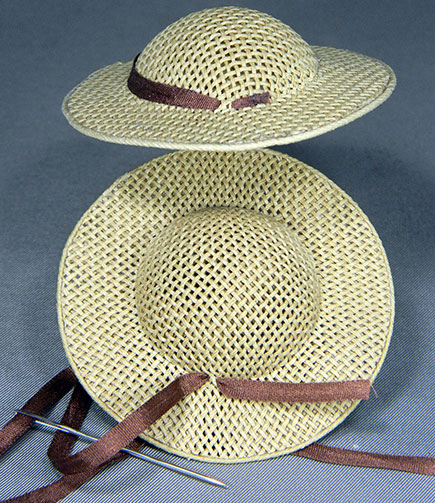 Silk ribbon trim is applied in two sections. Top view shows the back section as it is applied and glued down, and lower view shows how this is done.
|
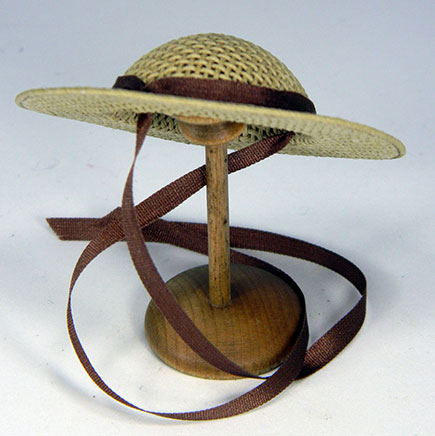 Finished hat with second piece of ribbon, which is also the two long ties.
 |
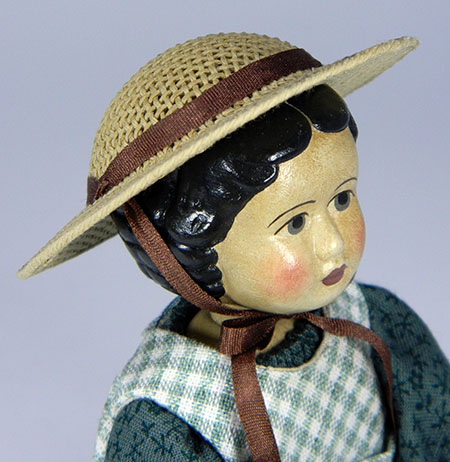
In the instructions, it will tell you how to make a permanent bow, but still be able to take the hat on and off (without fussing each time with a bow). |
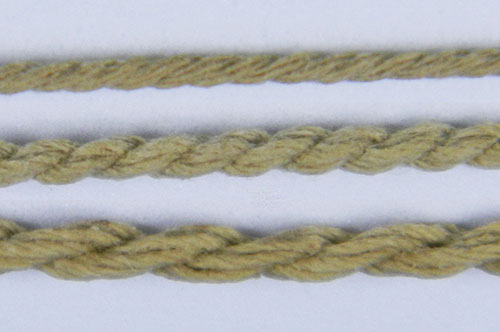 Long linen threads were unraveled from the mesh and included in your kit. Follow the directions for twisting various amounts together using a drill with a cuphook or hook made of heavy wire in the drill chuck as shown below. Fast and easy way to twist these into the necessary trims needed - and the baskets' handles.
 |
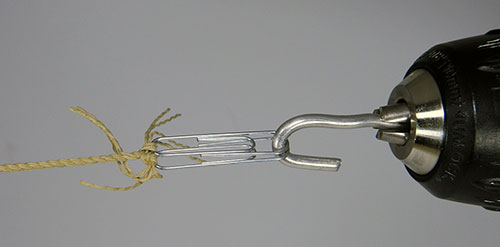 Cordless drill twisting the twists while holding the other ends taut.
 |
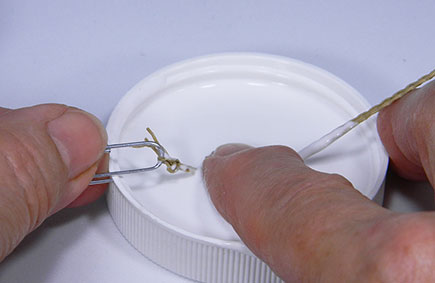 Running the threads through glue mix under one finger.
 |
 This pic is of the 3 types of twists you will need drying on my ironing board while held taut with pins stuck into ironing board padding. There is a piece of wax paper protecting the ironing board cover from wet glue.
 |
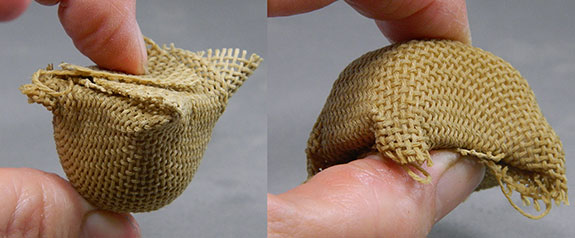 Basket Molding: The first pull-around, by first stretching moist mesh over rounded end of form, then pulling opposite corners up and folding over each other on flat sides of forms.
 |
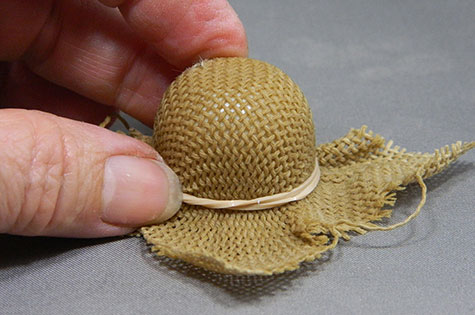 Next step for both basket forms is to pull on rubberband and get rubberband all way down to bottom (bottom = flat side of mold sitting on table). Shown is round basket. You will mold two each of both basket forms.
 |
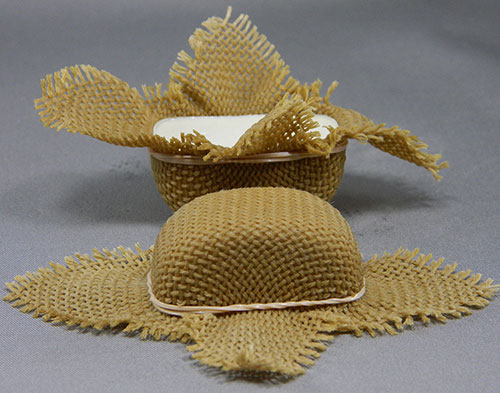 Here you see the rectangular market basket both upside down (foreground) and right side up (background pic).
 |
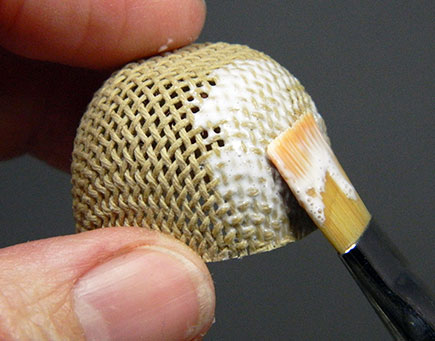 After dry and removed from forms with excess trimmed off just after rubberband line (toward raw edges), choose which of each set of forms fits best inside the other. This will be the inner layer. Paint glue mix on sides of this inner layer.
|
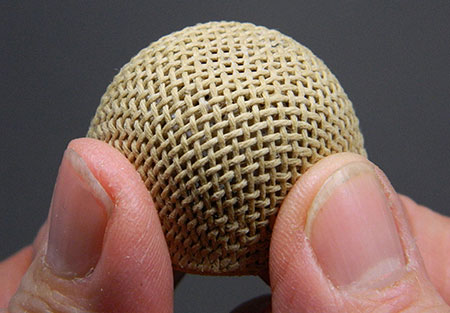 Now put the two layers together and fuse by pinching all around the edges.
 |
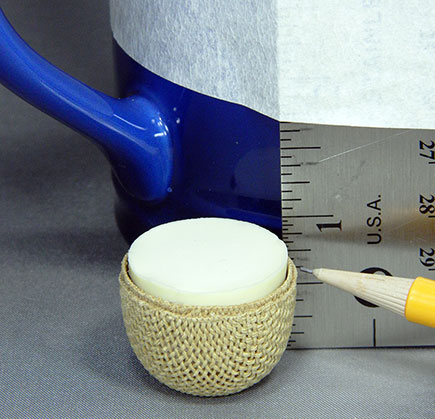 Here you see a fused double layer of the round basket held up to a ruler held verticle (I taped mine to my tea mug) and make marks at four points N-S-E-W or 12-3-6-9 o'clock.
 |
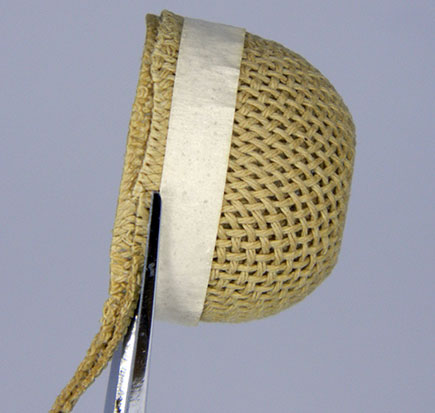 Run a piece of narrow (1/4") tape up to 4 pencil marks to give a line to cut by. With basket to right of your scissors (if right handed), trim basket double fused edge at tape.
 |
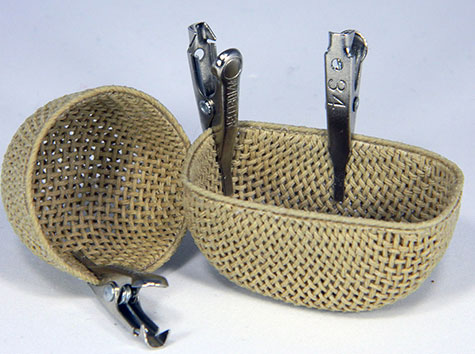 As you did for the hat, glue on the twist for trimming raw edges. Begin and end at point where one side of handle will be.
 |
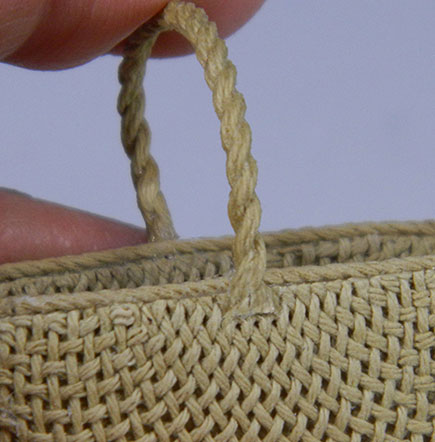 Cut off 2-1/4" long lengths of handle twist, pinch ends flat with pliers and glue at rim of baskets.
 |
|
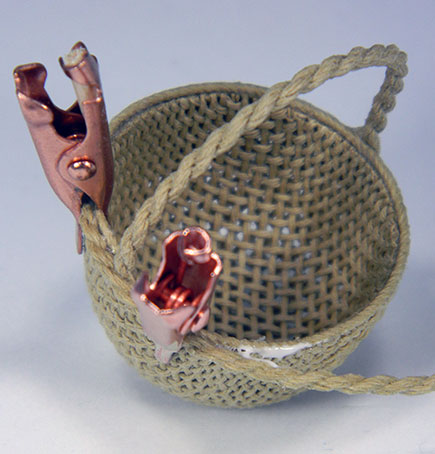 Now trim outside edge with basket trim. This will run right next to the thinner twist that finishes off the raw cut edges. Do not start/end at a handle.
 |
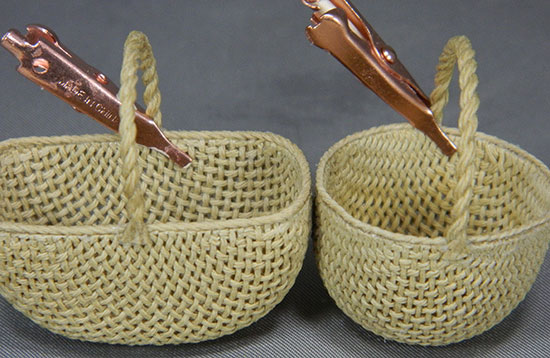
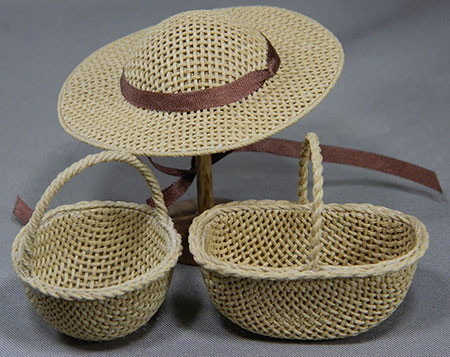 Finished mesh items. If you look around at pill bottles and other odds and ends about the house, you may spot other basket shapes you can make. Additional linen mesh is available on my Website under Supplies.
 |
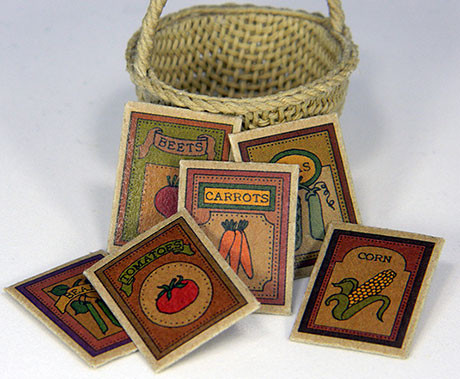 Tiny seed packages are cut out using very sharp and small trimming scissors along the printed lines, then glued into envelopes and ready for the garden.
 |
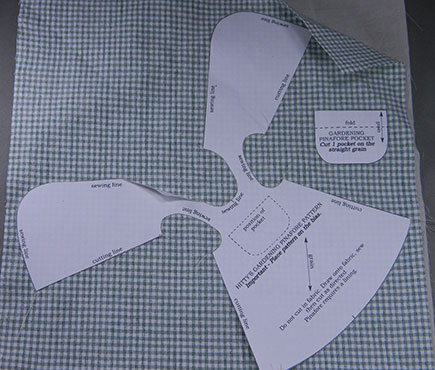 Layer fabric (WS up if it matters) on batiste lining. Due to the gingham check, this pinafore is cut on the bias. The pattern is printed on freezer paper which you can iron onto the fabric. Since it will stick, you can then sew right up against the cut edge of pattern. See pic below for closeup.
 |
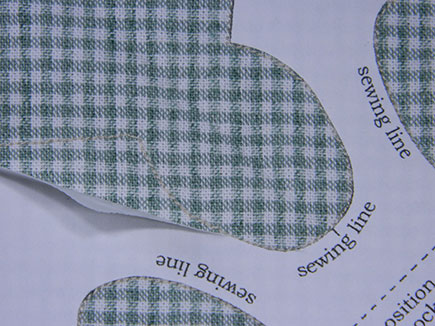 Close-up of sewing line. If you look closely you can see the stitching where the freezer paper is peeled back.
 |
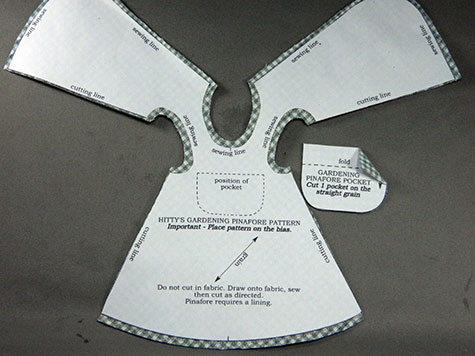 After the sewing lines are completed cut out the pinafore allowing SA outside the sewn lines and cutting right on the cut lines (lines are specified on the pattern). Clip SA along inner curves.
 |
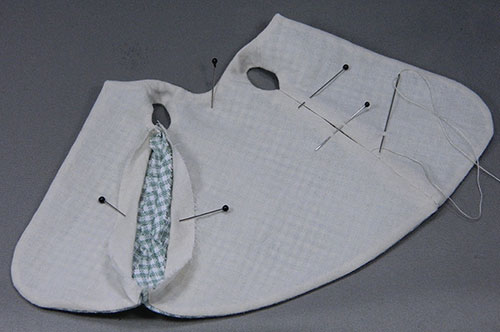 Pinafore has been turned RS out, pressed and only the side seam of the outer fabric is sewn by machine. Be careful not to catch lining layer as you sew. Open SA and then fold in the lining SA so it is flat and well mannered at the armhole and hem, then hand sew the lining closed.
 |
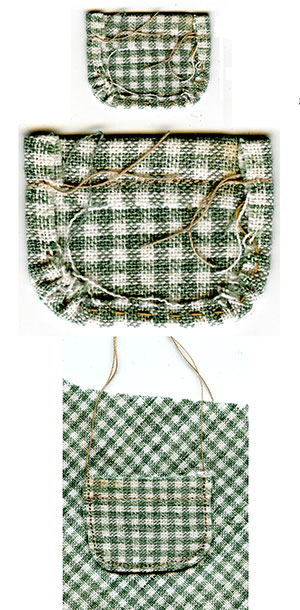 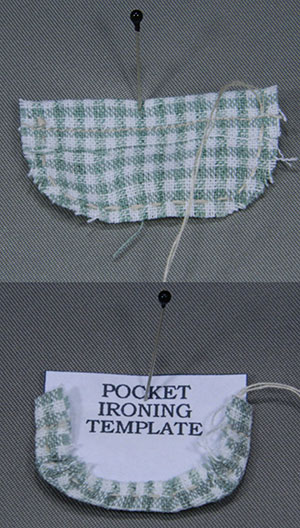 Above are shown the steps for making the pocket. First fold down the top hem and stitch. Then hand sew a tiny running stitch close to curved raw edge. Pull up stitches against the paper Pocket Ironing Template and iron the SA. Paper will stick up higher than top edge of pocket.
 |
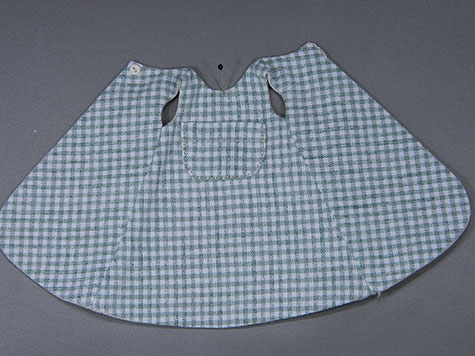 Pocket sewn on pinafore so top edge of pocket is level with bottom of armholes. Pull starting and ending threads to back side and tie secure knots which you can dot with glue. Sew the tiny button on the right back panel (as it faces you) and sew a thread loop on the other corner that snugly fits over button.
 |